To help you learn how to use natural reflectors to enhance your photos, I’m bringing you a new blog series lovingly titled ‘Find Your Light’. This is the third and final post in a 3 part blog adventure where we’ll be cultivating and capturing the holidays (and beyond!) with what I think is the #1 tool you need to photograph effectively and beautifully. LIGHT. Your first post all about low light and ways to make your Christmas tree sparkle and glow, the second post was a basic light overview, and today we’re talking about taking your basic light techniques one step further with ways to naturally reflect light correctly.
I hate the winter.
It’s official.
The cold, the dark, the dry skin and creaky bones.
It’s hard for me to get motivated to do ANYTHING this time of year.
I keep mentioning to my husband that we need to move to Florida or Texas or somewhere south. (maybe one of these days we’ll actually get the courage to just DO IT)
But there is one good thing about these cold winter months.
Snow.
It’s gorgeous to watch as it floats down from the sky and blankets the ground in magical powder, it means spending a day snuggled up in the house with your family watching movies and drinking cocoa, and when I was a teacher it meant I got out of work for a day (or two or three if we were REALLY lucky!)
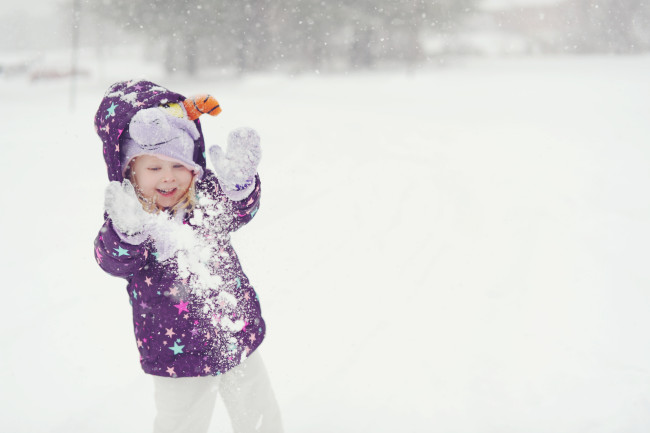
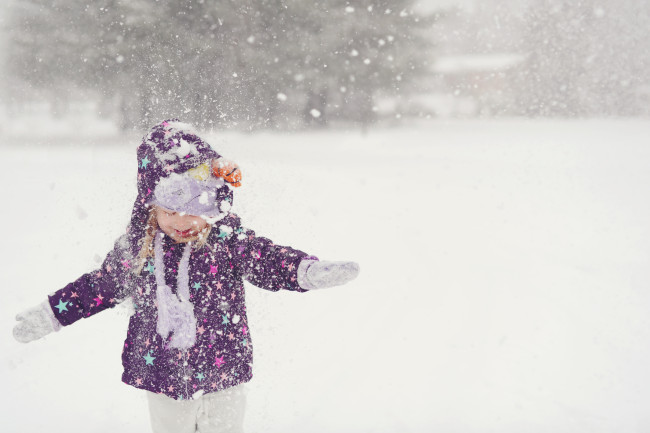
There’s also one other awesome thing about the snow and how it relates to photography. It is a natural reflector!
And that light reflection does BEAUTIFUL wonders to our pictures.
You know the photos where the kids’ skin tones are vibrant, bright, and even? Oh and there is even that signature sparkle of catchlights in the eyes?

Those pictures were created with light that was being reflected properly.
Professional photographers can bend the light the exact way they want with fancy reflecting tools.
But as a mom with a busy and active preschooler anything I can do to find and reflect light effectively and naturally without having to lug around or learn professional equipment is so much better!
So, the question becomes, how where and how do we find those natural reflectors and use them correctly?
I brought up snow because it is one GREAT natural reflector. Typically on snowy days there is cloud cover, which will make the light less direct (GOOD!). There is also a blanket of white covering the ground (BETTER!).
When the light from the sky hits the white snowy ground it bounces.
Where does it bounce?
Up!
Washing even lighting over your kiddos faces.
Unfortunately snow doesn’t stick around too long and it makes for quite cold and wet shooting conditions, so here are some other places you can and should be looking for natural reflectors:
Sidewalks
Light Pavement
White walls
White fabric
I also think that before you go out and start snapping away in these conditions that you simply go on a ‘light walk’ through your neighborhood and/or home observing your surroundings.
 Here’s how to use natural reflectors:
1) Watch where your light source is coming from (whether that be sun light or window light). Look towards the sky or the window to figure out where the light is.
2) Look at where that light hits first (the ground, the floor, a wall, etc…).
3) Ask yourself some of these questions to figure out where the light is bouncing to and how to place your child:
is there an opposite wall that is well lit?
Is it bouncing from something light on the ground back up to the face?
Is there a hot spot of light streaming in through a window that you need to avoid?
Sidenote: There is also such thing as BAD reflectors of light. Bright bold colors on the ground, in rooms, can reflect the wrong light. (i.e.: at the pumpkin patch the pumpkins were reflecting ORANGE back up and onto my daughters face…not the look I was going for and not easy or always possible to correct in editing). Dark colors are also not ideal. Dark rooms, roads, etc…will soak in the light and can make images appear dull and make catchlights and beautiful skin tones difficult to achieve.
4) Practice time!! Once you start making the observations above it’s time to practice. The more you start looking for light, how it reflects, AND you start shooting in it; the better and more natural your eye will be trained to find the best light for your photos. So go out on a ‘light walk’, bring your kiddos along, and practice, practice, practice!